Category Archives: Linux

locale: Cannot set LC_CTYPE to default locale

I have an Ubuntu 24.04 server and I have the following errors when I run “locale” command:
locale: Cannot set LC_CTYPE to default locale: No such file or directory locale: Cannot set LC_MESSAGES to default locale: No such file or directory locale: Cannot set LC_ALL to default locale: No such file or directory
That’s how I fixed it:
sudo apt-get update
sudo apt-get install locales
sudo locale-gen en_US.UTF-8
sudo update-locale LC_ALL=en_US.UTF-8

Pi-Hole and IPV6 – How to make it work?

Im using Pi-Hole with IPV4, recently I discovered my router Xiaomi AX1800 (OpenWRT) supports IPv6, as well as my ISP (A1).

I noticed that I can assign DHCP static IPv4 assignment from the router’s interface, but I can’t do the same for IPv6. That’s why I decided to set a static IPv6 address for the machine running Pi-Hole (Raspberry Pi 2).

There is a short guide on how to do that:

Continue reading

Organize pictures by the data taken


#!/usr/bin/env bash
BASE_DIR=$1

if [ ! -d "${BASE_DIR}" ] ; then
echo "$BASE_DIR is not a directory";
fi

## Find those files that are older than a month
find "$BASE_DIR" -maxdepth 1 -mtime +30 -type f -name '*.jpg' |
while IFS= read -r file; do
## Get the file's modification year
year="$(date -d "$(stat -c %y "$file")" +%Y)"
## Get the file's modification month
month="$(date -d "$(stat -c %y "$file")" +%b)"

## Create the directories if they don't exist. The -p flag
## makes 'mkdir' create the parent directories as needed so
## you don't need to create $year explicitly.
[[ ! -d "$BASE_DIR/$year/$month" ]] && mkdir -p "$BASE_DIR/$year/$month";

## Move the file
mv "$file" "$BASE_DIR/$year/$month"
done

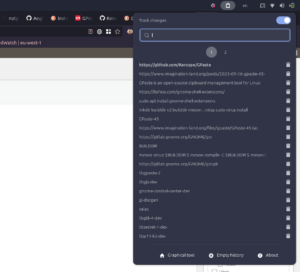
Hot to install GPaste on Ubuntu 23.10

GPaste is an open-source clipboard management tool for Linux-based operating systems. Clipboard managers like GPaste allow users to manage and access a history of items they have copied to the clipboard, enabling them to easily paste previously copied content.

Sadly, there are binary packages available but you can compile it and install it manually.

Continue reading

Docker fails to fetch http://deb.debian.org/debian/dists/buster/InRelease

I found a network issue when trying to build my docker image: the command `apt update` fails with the following error:

W: Failed to fetch http://deb.debian.org/debian/dists/buster/InRelease
W: Failed to fetch http://deb.debian.org/debian/dists/buster-updates/InRelease
W: Failed to fetch http://security.debian.org/dists/buster/updates/InRelease
W: Failed to fetch http://deb.debian.org/debian/dists/buster/Release.gpg Temporary failure resolving ‘deb.debian.org’
W: Failed to fetch http://security.debian.org/dists/buster/updates/Release.gpg Temporary failure resolving ‘security.debian.org’
W: Failed to fetch http://deb.debian.org/debian/dists/buster-updates/Release.gpg Temporary failure resolving ‘deb.debian.org’
W: Some index files failed to download. They have been ignored, or old ones used instead.

This happens because your ISP DNS servers are not reachable from this network. The easiest workaround is to directly instruct Docker to rely on some public DNS servers proven to be stable and reliable (Google, Cloudflare).

Add them to a new configuration file called daemon.json:

$ sudo pico /etc/docker/daemon.json

Insert the following:

{
    "dns": ["1.1.1.1", "8.8.8.8", "8.8.4.4"]
}

Then restart the service:

$ sudo service docker restart

How to install autojump for Fish on Ubuntu

Autojump is a tool that can be used to jump around in the shell to frequently used directories by typing just a part of their name. It is typically aliased to j. Autojump is available as a package in the Ubuntu repositories, but it needs manual intervention to be available in the fish shell.

1. Install autojump

sudo apt install autojump

2. Source the autojump.fish file in your fish configuration, by opening the file ~/.config/fish/config.fish in an editor and adding these lines:

begin
    set --local AUTOJUMP_PATH /usr/share/autojump/autojump.fish
    if test -e $AUTOJUMP_PATH
        source $AUTOJUMP_PATH
    end
end

3. Add j shortcut command to fish creating a new file ~/.config/fish/functions/j.fishwith the following content:

function j
    set new_path (autojump $argv)

    if test -d "$new_path"
        echo $new_path
        cd "$new_path"
    else
        echo "autojump: directory '$argv' not found"
        echo "Try \`autojump --help\` for more information."
        false
    end
end

Usage examples:

j Down – changes to my Downloads folder
j work – changes to my workspace folder

Enjoy!

GSConnect doesn’t mount my phone on Manjaro Gnome, this is the solution

Hi there! I am using the Gnome shell extension GSConnect on Manjaro Gnome to share files from my phone to my laptop. There is an option called “Mount” that initially didn’t work on Manjaro but I found a solution and it now works like a charm!

All you need to do is to edit the file /etc/ssh/ssh_config

sudo vim /etc/ssh/ssh_config

and add to the end of the file the following:


Host 192.168.*.*
HostKeyAlgorithms +ssh-rsa

Install docker and docker-compose on Linux Mint 20.3

Issue the following commands in the terminal, one by one and you are ready to go! It’s simple as that 🙂

#docker setup
echo "deb [arch=amd64] https://download.docker.com/linux/ubuntu focal stable" | sudo tee /etc/apt/sources.list.d/docker.list
curl -fsSL https://download.docker.com/linux/ubuntu/gpg | sudo apt-key add -
sudo apt update
sudo apt install docker-ce docker-ce-cli containerd.io pigz

#execution permission
sudo usermod -aG docker $USER

#docker compose
sudo curl -L "https://github.com/docker/compose/releases/download/2.2.3/docker-compose-$(uname -s | tr '[:upper:]' '[:lower:]')-$(uname -m)" -o /usr/local/bin/docker-compose
sudo chmod +x /usr/local/bin/docker-compose</pre>

Fingerprint reader 0a5c:5843 Broadcom Corp. 58200 Ubuntu / Linux mint driver install

First, we need to checkout the following repo containing the driver:

git clone https://git.launchpad.net/~oem-solutions-engineers/libfprint-2-tod1-broadcom/+git/libfprint-2-tod1-broadcom/

Then go into the cloned folder and issue the following commands:

sudo sh install.sh
python3 debian/update-fw.py

You may need to restart the laptop in order the changes to be applied.

Finally, enable fingerprint login using the following command:

sudo pam-auth-update