Category Archives: Ubuntu

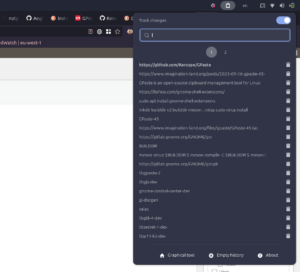
Hot to install GPaste on Ubuntu 23.10

GPaste is an open-source clipboard management tool for Linux-based operating systems. Clipboard managers like GPaste allow users to manage and access a history of items they have copied to the clipboard, enabling them to easily paste previously copied content.

Sadly, there are binary packages available but you can compile it and install it manually.

Continue reading

How to install autojump for Fish on Ubuntu

Autojump is a tool that can be used to jump around in the shell to frequently used directories by typing just a part of their name. It is typically aliased to j. Autojump is available as a package in the Ubuntu repositories, but it needs manual intervention to be available in the fish shell.

1. Install autojump

sudo apt install autojump

2. Source the autojump.fish file in your fish configuration, by opening the file ~/.config/fish/config.fish in an editor and adding these lines:

begin
    set --local AUTOJUMP_PATH /usr/share/autojump/autojump.fish
    if test -e $AUTOJUMP_PATH
        source $AUTOJUMP_PATH
    end
end

3. Add j shortcut command to fish creating a new file ~/.config/fish/functions/j.fishwith the following content:

function j
    set new_path (autojump $argv)

    if test -d "$new_path"
        echo $new_path
        cd "$new_path"
    else
        echo "autojump: directory '$argv' not found"
        echo "Try \`autojump --help\` for more information."
        false
    end
end

Usage examples:

j Down – changes to my Downloads folder
j work – changes to my workspace folder

Enjoy!

Install docker and docker-compose on Linux Mint 20.3

Issue the following commands in the terminal, one by one and you are ready to go! It’s simple as that 🙂

#docker setup
echo "deb [arch=amd64] https://download.docker.com/linux/ubuntu focal stable" | sudo tee /etc/apt/sources.list.d/docker.list
curl -fsSL https://download.docker.com/linux/ubuntu/gpg | sudo apt-key add -
sudo apt update
sudo apt install docker-ce docker-ce-cli containerd.io pigz

#execution permission
sudo usermod -aG docker $USER

#docker compose
sudo curl -L "https://github.com/docker/compose/releases/download/2.2.3/docker-compose-$(uname -s | tr '[:upper:]' '[:lower:]')-$(uname -m)" -o /usr/local/bin/docker-compose
sudo chmod +x /usr/local/bin/docker-compose</pre>

Fingerprint reader 0a5c:5843 Broadcom Corp. 58200 Ubuntu / Linux mint driver install

First, we need to checkout the following repo containing the driver:

git clone https://git.launchpad.net/~oem-solutions-engineers/libfprint-2-tod1-broadcom/+git/libfprint-2-tod1-broadcom/

Then go into the cloned folder and issue the following commands:

sudo sh install.sh
python3 debian/update-fw.py

You may need to restart the laptop in order the changes to be applied.

Finally, enable fingerprint login using the following command:

sudo pam-auth-update

PHP Warning: PHP Startup: mcrypt: Unable to initialize module

If you have installed multiple PHP versions using PPA maintained by Ondrej SurĂ˝ you may end up with the following error message:

PHP Warning: PHP Startup: mcrypt: Unable to initialize module
Module compiled with module API=20190902
PHP compiled with module API=20170718

This is caused by a misconfiguration: the php.ini file is pointing to the latest version of mcrypt instead of the one compiled for PHP 7.2. To fix that you have to correct the path to the extension. Open the file for editing:


sudo vi /etc/php/7.2/cli/conf.d/mcrypt.ini

and replace extension=/usr/lib/php/20190902/mcrypt.so with extension=/usr/lib/php/20170718/mcrypt.so. Do the same for /etc/php/7.2/fpm/conf.d/mcrypt.ini file.

If you have the module mcrypt.so listed in /etc/php/7.2/cli/php.ini or /etc/php/7.2/fpm/php.ini – delete it to avoid “PHP Warning: Module ‘mcrypt’ already loaded in Unknown on line 0” error

Install the latest versions of Vagrant and VirtualBox on Linux Mint 19.2

I use Linux Mint 19.2 as daily driver on my ThinkPad L480. This step by step tutorial will guide you through the process of getting the latest versions of VirtualBox and Vagrant instead of the outdated versions available in the official Ubuntu repositories.

VirtualBox and Vagrant receive updates on Linux much often than the repositories update. If you want to consistently get these updates when they become available, you’ll want to add VirtualBox and Vagrant repository to your system. This will allow you to get notified for new versions and update trough Linux Mint Update Manager and apt.

Continue reading

This machine ID is already enabled with a different key or is non-unique

I have purchased new VPS and I wanted to enable Ubuntu live patch service for it. Unfortunately, the command canonical-livepatch enable [TOKEN] failed with this ugly error message:

This machine ID is already enabled with a different key or is non-unique.
Either “sudo canonical-livepatch disable” on the other machine, or regenerate a
unique /etc/machine-id on this machine with
“sudo rm /etc/machine-id /var/lib/dbus/machine-id && sudo systemd-machine-id-setup” :
{“error”: “Conflicting machine-id”}

I thought to myself “Ok, let’s try the suggested solution”. What I did was to backup the file /etc/machine-id, than delete it and run suggested systemd command. I was surprised to see the newly generated UUID was the same! Consulting with man page of systemd-machine-id-setup command revealed that “If run inside a KVM virtual machine and a UUID is configured (via the -uuid option), this UUID is used to initialize the machine ID. The caller must ensure that the UUID passed is sufficiently unique and is different for every booted instance of the VM.”. Obviously, my new VPS provider did not ensure that and somebody else has the same machine ID on his/her VPS and enabled Ubuntu live patch for it.

Continue reading

Control screen backlight brightness from the command line

I have a Dell Latitude E5430 running Linux Mint 19 Tara. In Cinnamon, my function keys for brightness work correctly, but that was not the case with i3wm session. My first bet was to bind shortcuts executing xbacklight command but it doesn’t work because of this bug. So, I started to research for workaround and I found brightlight – “a program that can get and
set the screen backlight brightness on Linux systems using the kernel sysfs
interface.”. Sounds perfect but there are no prebuild binaries so you need to do it by yourself. The following steps are short guide how to build and install brightlight on Ubuntu and Ubuntu derivatives.

Continue reading

How to install PHP Data Structures (DS) extension on Ubuntu 16.04

First, you will need to install PEAR via apt-get to get the necessary package and distribution system that both PEAR and PECL use. From a shell prompt enter:

sudo apt-get install php-pear

You will be prompted to confirm the install. Just press “y” and enter. If all goes well you should see it download and install the php-pear package.

Now you will need to install the php-dev package to get the necessary PHP7 source files to compile additional modules. Enter the following from a shell prompt:

sudo apt-get install php-dev

If you do not install the php-dev package and try to install a PECL extension using “pear install”, you will get the following error:

sh: phpize: not found
ERROR: `phpize’ failed

The PECL_HTTP extension requires an additional dependency package to be installed. You can probably skip this for other extensions:

sudo apt-get install libcurl4-openssl-dev

Now we are finally ready to actually install the extension. From a shell prompt enter following:

sudo pecl install ds

The installer may ask you about some specific options for the extension you are installing.  Just accept the defaults and go ahead.

Once the install is complete, it’s time to enable the extension.
First, edit the following file (create it if it does not exist already):

sudo vi /etc/php/7.0/mods-available/ds.ini

and change it’s contents to:


; configuration for php ds module
; priority=30
extension=ds.so


Than check and remove any symbolic links to 20-ds.ini file, such as:

sudo rm /etc/php/7.0/fpm/conf.d/20-ds.ini
sudo rm /etc/php7.0/apache2/conf.d/20-ds.ini
sudo rm /etc/php7.0/cli/conf.d/20-ds.ini

You need to remove above listed symlinks because of bug: there is hard dependency on the json extension. DS extension shouldn’t try to implement JsonSerializable if the json extension is not loaded, but actually do it and it will complain with exception if it is not found:


PHP Warning:  PHP Startup: Unable to load dynamic library '/usr/lib/php/20151012/ds.so'
 - /usr/lib/php/20151012/ds.so: undefined symbol: php_json_serializable_ce in Unknown on line 0

That’s why we removed 20-ds.ini symlinks and specified ds.so to load after json is already enabled.

Now, disable and then re-enable the extension:

sudo phpdismod ds
sudo phpenmod ds

You may need to restart your HTTP server:

# If you are on apache
sudo service apache2 restart
# if you are on nginx
sudo service nginx restart

How to compact VirtualBox’s VDMK file size

This guide explains how to shrink (compact) the virtual disk files (files having extension .vmdk) of your VirtualBox virtual machines so they consume less disk space. It is also easier to upload and share them with other people.

Fill the free space with zeros
VirtualBox only knows that the space is really free if it’s been set to zero, and standard deletion won’t do this. Login into the virtual machine and run the following command:

cat /dev/zero > zero.fill; sync; sleep 1; sync; rm -f zero.fill

Navigate to VirtualBox virtual machine folder
The virtual machines you have configured in VirtualBox are stored in folder “VirtualBox VMs” inside your home directory (or at least when Ubuntu is your host machine). Every machine has its own directory with name starting with the machine name. You have to navigate to the folder containing the files of the virtual machine having disk you want to compact and open terminal.

Get the UUID of the virtual disk
You have to obtain the UUID of the disk you want to shrink. I will explain you why later.
The command to do this is:

vboxmanage showhdinfo box-disk1.vmdk

This command assumes that your working directory is the directory that contains the vmdk file. Of course, you have to change the name of the vmdk file if it is different.
Write down the reported UUID because you will need it later.

Convert it to vdi
In order to compact the disk, you need to convert it to VDI format using this command

VBoxManage clonehd box-disk1.vmdk box-disk1.vdi --format vdi

Compact

VBoxManage modifyhd box-disk1.vdi --compact

Convert it back to vmdk

VBoxManage clonehd box-disk1.vdi box-disk1.vmdk --format vmdk
rm box-disk1.vdi

Set the original UUID
You converted the original vmdk disk file to vdi, compacted it and created new vmdk file from the compacted one. So, basically, you have created new virtual disk with new UUID which will not be recognized by VirtualBox unless you set the original disk’s UUID to the newly created one using the following command:

vboxmanage internalcommands sethduuid ./box-disk1.vmdk <original UUID here>

VoilĂ ! The virtual disk size is successfully reduced!

Leave me a comment if you have any troubles or ideas how to improve this article. I am not VirtualBox expert and so I can’t guarantee that the above guide is the easiest way to get the job done.